AI development environment on Ubuntu
Managing a database using the command line is fine for quick edits, but sometimes you need a visual tool like MySQL Workbench, DBeaver, or HeidiSQL to visualize your data.
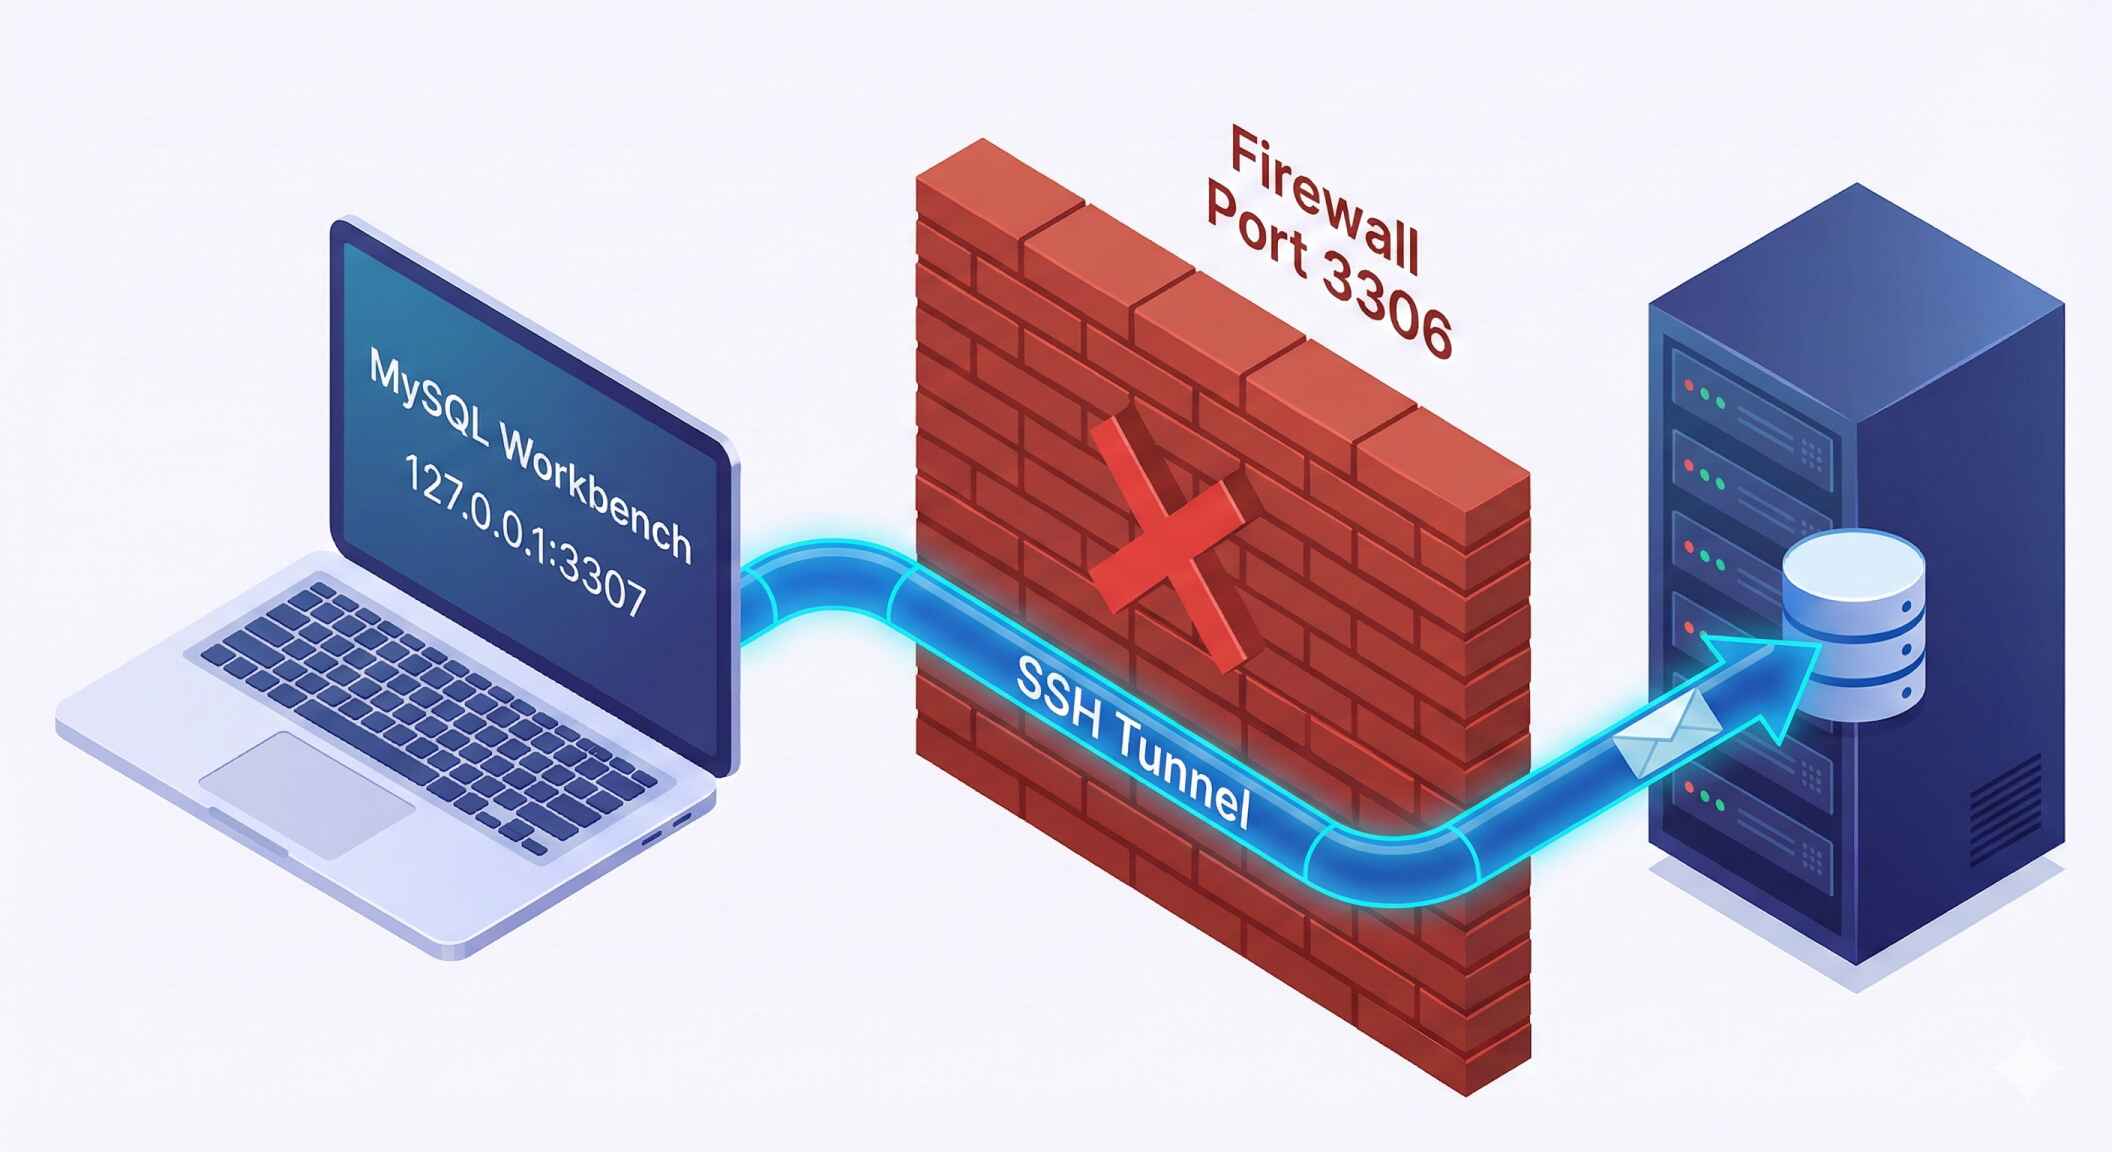
The mistake most beginners make is opening port 3306 in their firewall to allow these connections. Do not do this. Opening your database port to the public internet attracts hackers who will try to brute-force your password immediately.
The professional solution is an SSH Tunnel. This technique allows you to "piggyback" your database connection over your existing secure SSH connection. It requires no firewall changes and is 100% secure.
Prerequisites
- A Joy Services VPS with MySQL installed.
- SSH access to your server (which you already have).
- A database client installed on your computer (e.g., MySQL Workbench).
sudo ufw deny 3306
Step 1: Create a Tunnel via Command Line (Mac/Linux)
If you are on macOS or Linux, you can create a manual tunnel directly in your terminal. This maps a port on your laptop to the database port on the server.
1. Run the binding command:
ssh -L 3307:127.0.0.1:3306 root@your_server_ip
What does this do?
-L 3307:127.0.0.1:3306: Tells SSH to listen on your laptop's port 3307 and forward it to the server's localhost port 3306.- We use 3307 locally because you might already have MySQL running on your laptop on 3306.
2. Connect your database client.
Now, open your database tool and connect to:
- Host: 127.0.0.1 (Localhost)
- Port: 3307
- Username: Your database user
- Password: Your database password
Step 2: Using MySQL Workbench (Windows/Mac)
Most GUI tools have this feature built-in, so you don't even need to open a terminal. Here is how to set it up in the official MySQL Workbench.
1. Open MySQL Workbench and click the (+) icon to add a new connection.
2. Change "Connection Method".
Select Standard TCP/IP over SSH from the dropdown menu.
3. Fill in the SSH Parameters (The "Hallway"):
SSH Hostname: your_server_ip
SSH Username: root (or your sudo user)
SSH Password: (Your VPS login password)
SSH Key File: (Optional, if you use SSH keys)
4. Fill in the MySQL Parameters (The "Locked Room"):
MySQL Hostname: 127.0.0.1
MySQL Server Port: 3306
Username: (Your MySQL username)
Password: (Your MySQL password)
127.0.0.1 because relative to the server, the database is running locally!
5. Click "Test Connection".
If successful, Workbench will log into your server via SSH first, then connect to the database locally.
Step 3: Using DBeaver (Alternative Tool)
DBeaver is another popular free tool that supports this.
- Create a new MySQL connection.
- Click on the "SSH" tab next to "Main".
- Check "Use SSH Tunnel".
- Enter your VPS IP, username, and password.
- Go back to the "Main" tab and enter your Database credentials (keeping Host as localhost).
Summary
You can now manage your remote database using a convenient visual interface without compromising security. You have achieved:
- Zero Open Ports: Your firewall remains tight.
- Encrypted Connection: All data traffic is encrypted inside the SSH tunnel.
- Convenience: You can use powerful tools like Workbench or DBeaver instead of the command line.